

In Unless, you can create two types of experiences: on-site and components. In this article, we'll walk you through the steps for setting up an on-site experience. As the name suggests, on-site experiences allow you to make changes directly on the page. You can, for example, adjust the content, buttons, images, move or delete page elements, and more.
Experience settings
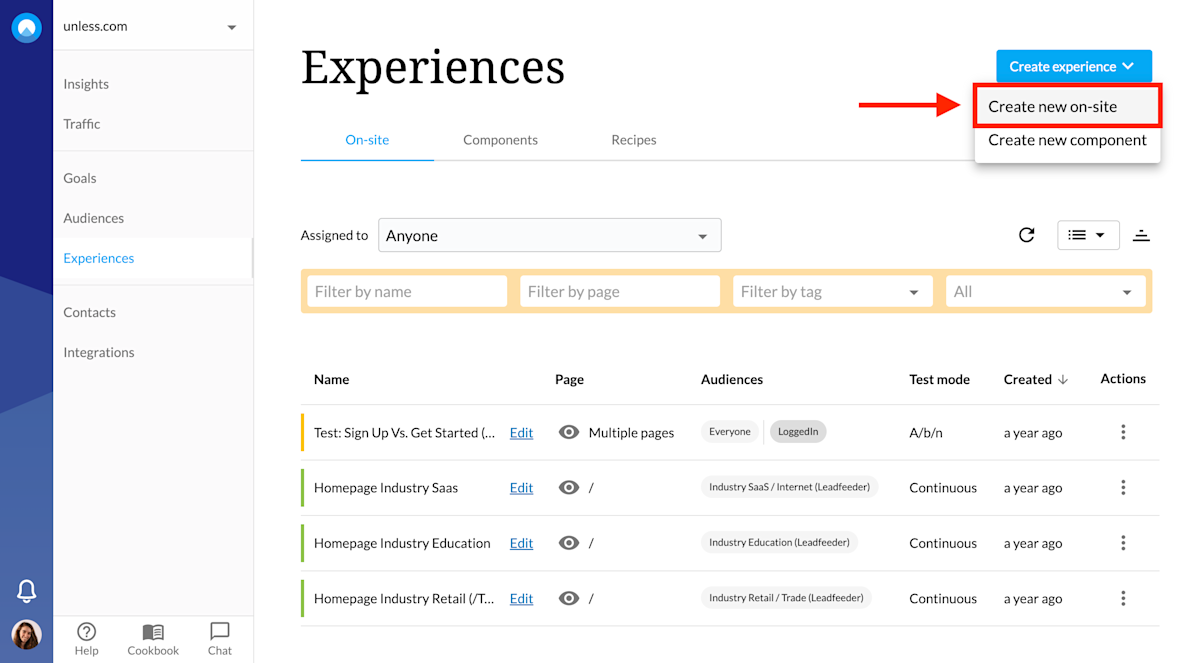
Once you've selected "create new on-site" you will be led to the Settings page for this experience. Here you can give your experience a descriptive name and select who you would like to target by including or excluding audiences you've already created. This is also where you define whether you'd like to apply your experience to a single page, multiple, or all pages.
If you aren’t sure which pages to start with, your homepage, landing pages, and checkout pages are all good options. You can also take a look at your analytics data to find some inspiration. If you're wondering what to change first: headlines, images, the value proposition, and the call-to-action are all good places with high potential impact.
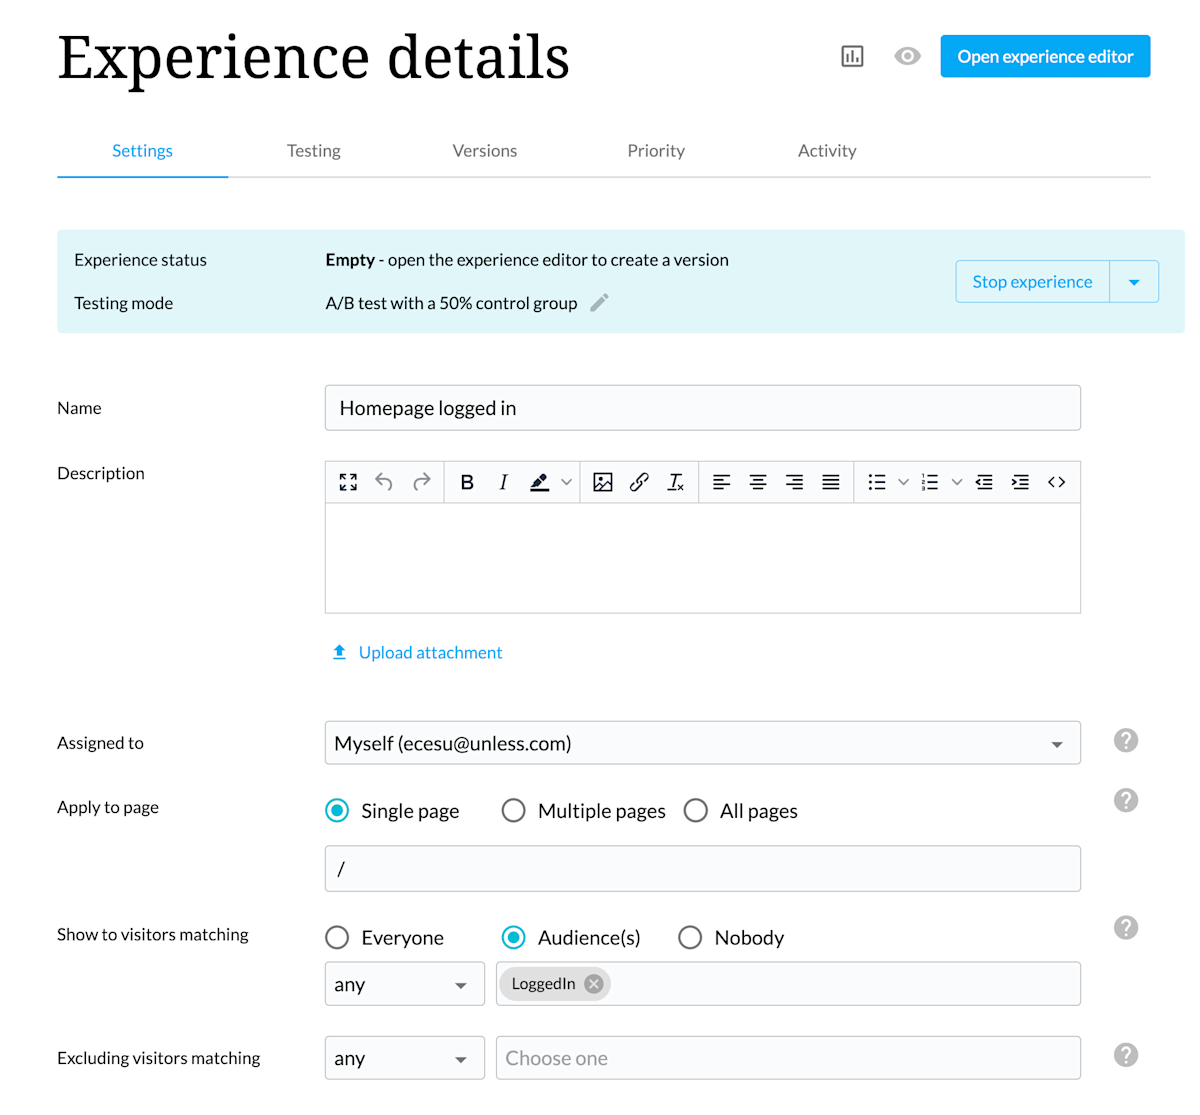
Here is a live example from our website: an experience we've set up on the homepage for logged-in users. The name, page, and audience have all been defined.
Ps. You can assign experiences to yourself or colleagues and add additional information such as a description or an attachment. Unless offers user roles such as editor, publisher, and administrator so keep this in mind as well.
Advanced settings
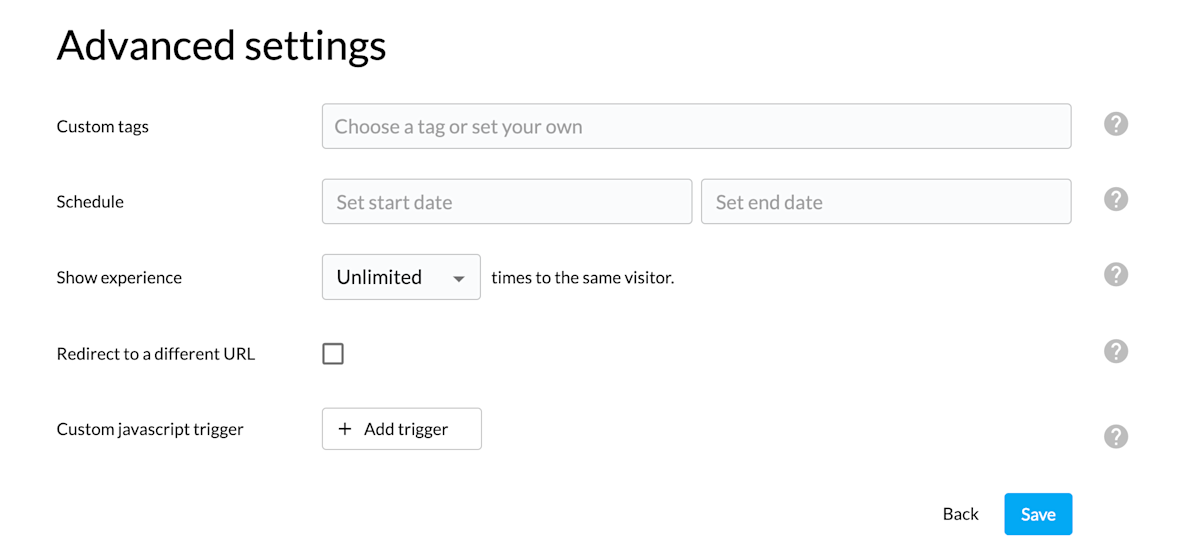
Next up, see if any of the advanced settings are relevant for the experience you are creating. Here you can make use of custom tags to keep your account organized. You can schedule your experience to start and/or end at a certain date and time while also defining whether you want to keep showing this experience or put a limit on it such as "maximum 3 times". It is also possible to redirect to a different page and to add a custom javascript trigger.
Experience editor
Once you've adjusted the settings and clicked "save", you have two options: you can either select "open experience editor" directly or visit the Testing tab first. (Check out our testing article to find out more about this.) Once you open the experience editor, the page you defined will load within the Unless editor and you can start making changes.
The basic premise of experiences is that your visitors have different needs and expectations and with Unless, you can tailor your website to each one of them.
You can edit text, swap out images, change CTAs, and remove page elements. You can insert dynamic placeholders (find out more here), add a page goal, and override the page title. Finally, you can use advanced editing features to add custom Javascript and CSS as well. We created a separate guide that explains all the features of the design editor.
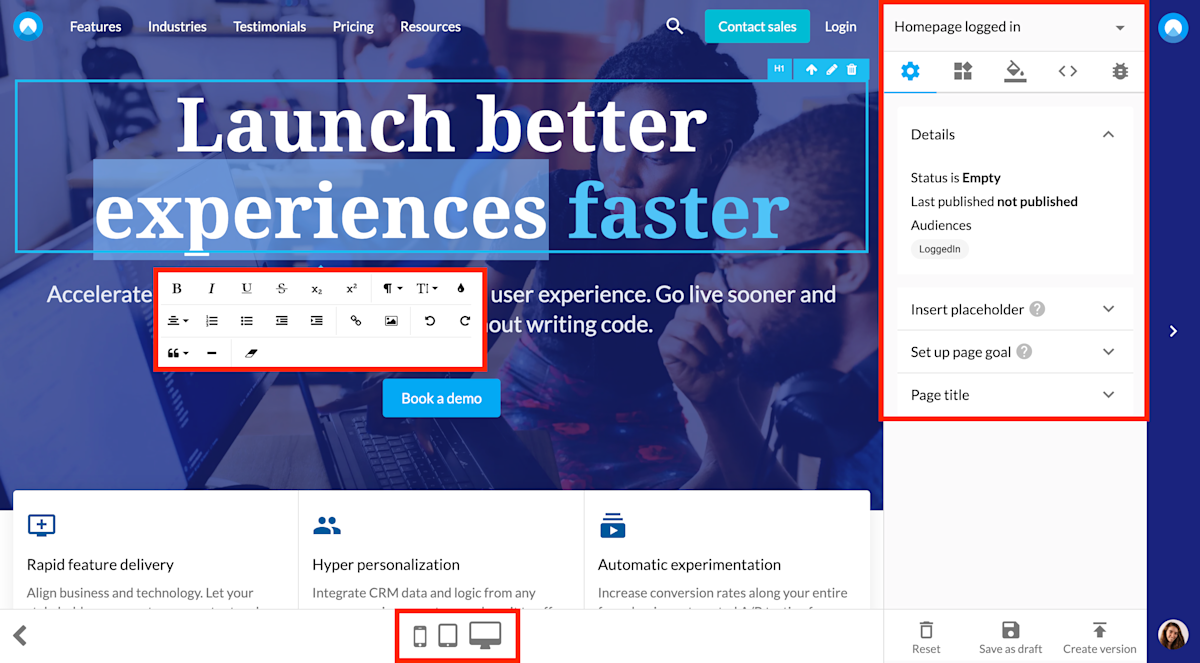
In this screenshot, you can see our WYSIWYG (what you see is what you get) editor as well as the side-panel on the right where you can set-up a page goal, add custom code and more. Additionally, using the icons at the bottom, you can check how the page will appear on desktop, tablet, and mobile devices.
Ready, set, go!
Once your experience is ready, you can save your draft, publish, and go live. Make sure to check out the Priority tab where you can prioritize your experiences with a drag and drop mechanism. Keep in mind that it is good practice to preview your experiences and test the page(s) you changed.
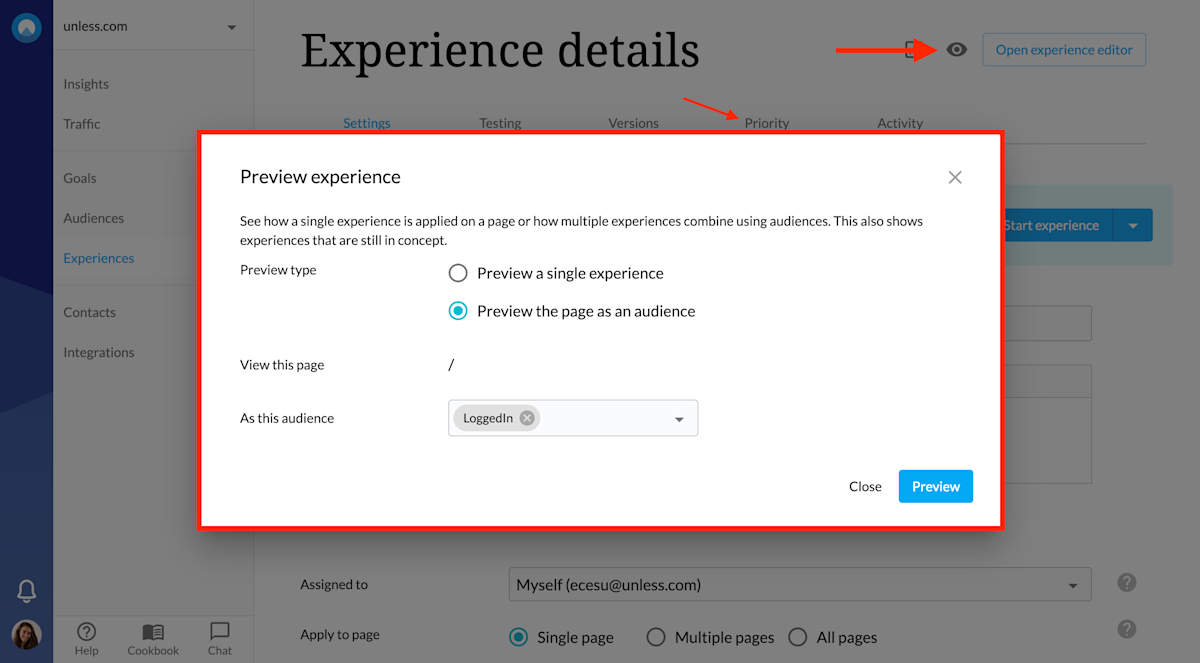
You can preview an experience via the settings page of that experience or via the general Experiences tab, using the eye icon. It is possible to preview a single experience or check out how a page will appear depending on the audience(s) one belongs to. That's all you need to know, now its time to create your on-site experience(s)!